My partner and I have started using greek yogurt in a lot of recipes and honestly, I thought why not make it from scratch?
And once you make greek yogurt at home, you can incorporate it in a lot of recipes to increase your protein intake.
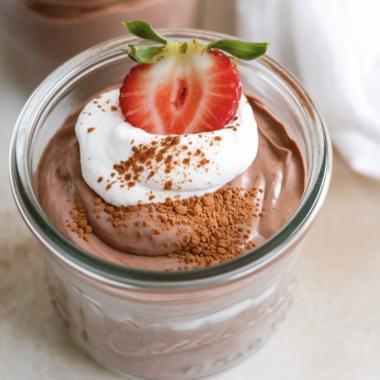
I just wrote this chocolate greek yogurt recipe here. Check it out.
It feels a little magical the first time you do it, warm milk turning into thick, tangy yogurt with almost no effort.
Once you start making it yourself, it’s hard to go back to store-bought because the texture is creamier, the flavor is cleaner, and you can control exactly how tangy or mild you want it.
I love keeping a jar of homemade Greek yogurt in the fridge because it works for breakfast, sauces, baking, and even quick desserts when I don’t want anything too complicated.
Let’s get to it!
Please note that this post includes affiliate links to tools I use in my kitchen. If you decide to click on a link and make a purchase, I may make a commission at no extra cost to you.
Tips to Make it Easier and Better
Using full-fat milk gives the creamiest result, and if you want that ultra-luxury texture, adding a splash of cream before heating makes a noticeable difference.
A thermometer makes this process almost foolproof, especially the first few times, and a digital kitchen thermometer really helps you hit the right temperatures without guessing.
For straining, reusable cloth works much better than paper towels, cheesecloth makes cleanup easy and keeps the yogurt smooth instead of grainy.
Keeping the yogurt warm while it ferments is the key to success, and if your kitchen runs cool, a yogurt maker or even an oven with the light on can give consistent results.
Store your finished yogurt in airtight containers so it stays fresh longer, and glass storage jars with lids are ideal because they don’t absorb smells and keep the yogurt tasting clean.
Homemade Greek Yogurt from Scratch
Course: Dessert, BreakfastDifficulty: Easy1
10
minutes15
minutesIngredients
4 cups full-fat milk (whole milk works best)
2 tablespoons plain yogurt with live cultures (store-bought is fine)
Optional: 1–2 tablespoons cream for extra richness
Directions
- Pour the milk into a saucepan and heat it over medium heat, stirring occasionally, until it just begins to steam and reaches about 82°C / 180°F, then remove it from the heat and let it cool naturally until it’s warm but not hot to the touch, around 43°C / 110°F.
- Once the milk has cooled, whisk a few tablespoons of the warm milk into the plain yogurt to loosen it, then gently stir this mixture back into the pot so the cultures are evenly distributed without overmixing.
- Cover the pot with a lid and wrap it in a thick towel, then place it in a warm, draft-free spot for 6 to 10 hours, depending on how tangy you like your yogurt, leaving it completely undisturbed while it sets.
- After the yogurt has thickened and smells pleasantly tangy, line a strainer with cheesecloth and place it over a bowl, then pour the yogurt in and let it strain in the fridge for 1 to 3 hours until it reaches a thick Greek yogurt consistency.
- Transfer the strained yogurt to a clean jar, stir it gently to smooth it out, and refrigerate for at least an hour before using so the texture fully settles.
Special Note:
- You can pair this with any toppings, I prefer honey and chocolate granola because it tastes so good!
Substitutions and Add-Ins:
For a milder yogurt, reduce the fermentation time to around 5–6 hours and strain lightly so it stays a bit softer.
If you want a tangier, thicker yogurt, let it ferment longer and strain for the full 3 hours or more.
You can make this with low-fat milk, but the yogurt will be thinner and less creamy unless strained longer.
For a dairy-free version, coconut milk can be used with vegan yogurt cultures, though the texture and flavor will be different from classic Greek yogurt.
If you loved this recipe, don’t forget to pin it on Pinterest, share it with friends, or leave a review below!
👉 Want More Easy Breakfast Recipes? Check out my favorites here!
This is proof that you don’t need a long ingredient list or complicated steps to make something that feels comforting and special.
It’s quick, flexible, and quietly satisfying, the kind of recipe that fits into real life without demanding extra effort.